Showing posts with label Holiday. Show all posts

Wednesday, February 19, 2014

Frozen Buttercream Transfer Resource Page to make Awesome DIY Homemade Cakes for any Occasion!

DIY frozen buttercream Transfer FBCT Cakes

I'm not a cake expert, I'm just a busy mom with a full-time job trying to make homemade custom "awesomeness" for my family. So don't expect to see cake perfection here.! The main reason I make homemade custom cakes is because my son has food allergies. I don't have the luxury of running to the local bakery for a child's birthday cake, so homemade is what it has to be for most of our special occasions. I had to find a simple solution for birthday celebrations and that's when I stumbled upon frozen buttercream transfers. The are safe, yummy, fun and easy to do, and the designs are endless!


Here is a list of my favorite resources that helped me learn how to make Frozen Buttercream Transfers for homemade cakes.

A wonderful step-by-step tutorial (complete with wonderful pictures) on Cake Central.


Great video by Kerry's Kakes that shows the motions (no words, just awesome ).

A video by Wiltoncakedecorating that take you through the process from start to finish. I couldn't help but laugh every time she said "wax," but it is a great tutorial.

"How to decorate a cake - Easy Cake Decorating Ideas and Tips" from BettyCrockerTV. This is what helped me learn how to work with icing.


My cakes. Not perfect, but fun enough!
  
Sonic the Hedgehog cake
for my son's 5th birthday.

My first
Frozen Buttercream Transfer
 Experiement.

Oilers Cake for my hubby.

Friday, January 17, 2014

Patriotic Buddy Poppy Wreath for Veteran's Day

Patriotic DIY Buddy Poppy Wreath
Due to the chaos/mess of the holidays, I didn't get this posted when I wanted. My soon-to-be sister-in-law asked for my help decorating the the local VFW's float for the Veteran's Day parade. I wish I can could claim the idea on this one but it was all hers. And it turned out to be a good one!
VFW Buddy Poppies
She was given a full box of Buddy Poppies to play with. And that we did. We pulled the tags off each one and left the wire stem. Then we simply stuck the stem into the foam wreath. She wanted red, white, and blue theme colors, so we attached a white and blue deco mesh bow to the bottom to take the Christmas-y look away from it.

Aside from the poppies blending together too much, I say it turned out cute! She was very pleased with the results. And here is one on the float! 
buddy poppy wreath on float

We had a lot of trouble finding the foam wreaths. At the time, they were out of stock everywhere. I wanted to get a larger one but we went with what we had. We also painted the signs with silver, red, and blue. We worked HARD on those! But I really have to give all the credit to my sister-in-law-to-be.  :)


Tuesday, October 29, 2013

"Baby" Halloween Pumpkin Idea for Daycare or Nursery.


A friend/co-worker's church put together a pumpkin patch this year and since I have never been to one (and to help them raise money), the kiddo and I made a trip last Friday to have some Fall fun!

I have been dying to make the "Baby" pumpkin for my Mom ever since I saw this on Pinterest. She doesn't get the chance to decorate much anymore and I thought this would be perfect for her daycare. She loved it! I think I may try it with a fake pumpkin so she will have one to set out every year.

The smallest pumpkin pictured was my kiddo's work and insisted it stayed in the picture. He was giddy about the tiny pumpkins and wanted to stick his purple vampire teeth in one. To give him "mean" eyes,  I let him use some red glitter glue I had laying around forever.

Monday, October 14, 2013

Creepy Halloween Skull Tray Tabletop Decor


So here is my real fake fruit bowl. Yay. Displayed all-year round on my buffet in my dinning area.  I have two chargers on top of a glass bowl. The bowl is pretty in itself, thinking of just making it a stand alone after Halloween.


I needed something new for the buffet this Halloween and I wanted to still use the two chargers. It needed to be creepy and somewhat disgusting (but not bloody disgusting! For the kiddo.) I didn't want to spend any money, so I dug around for some random bits from my treasure boxes in storage. The skulls were perfect! Kept the Autumn fruit from the bowl and the rat adds a nice touch (of plague!) Leaves are always falling off my fake vines and I am too lazy to stick them back on, so used them for garnish instead. Then added some spider webs .

I had fun editing and playing around with the photos for some creepy effects!


Friday, June 29, 2012

Canada Day Cupcakes with FREE Printable Flag Template.

Canada Day Cupcakes
Since my sweet hubby will have to celebrate Canada Day here in the States, I decided to have some festivities this coming Sunday to put a smile on his face :) We will be having my family over for lunch anyway so I figured, "Can't go wrong with cupcakes!"

I have so many ideas in mind: red velvet to cream stuffed or swirly red and white icing ideas...but I also have a budget and limited time. And the husband doesn't have a broad taste palet so I decided to go with simple chocolate chips cupcakes with red/white icing topped with Canadian Flags on toothpicks. I Google-searched high and low looking for free printable Canadian Flags but ended up with nothing. So I said it would be quicker to make them myself. And since I didn't find any fairly quick, I am posting them here to share!
Printable Canadian Flag template Cupcake Toppers
**UPDATE** LINK HAS BEEN CORRECTED 7/4/2017
Click HERE to get the FREE printable template for Canada Day Cupcake Flag. Once there, just right click and save!
 (if any troubles with DL, let me know. I may have to tweak it later but for now this will do :)

Unfortunately, my printer wanted to run out of ink and so some of the flags are "Off-color." I say that because I don't' want to call them pink :p


Cupcake Flag Instruction instructions after printing the template above:

 1.) Cut down white line in center of the page.

2.) Then cut out the strips of flags. DON'T cut out each individual flag. You want two flags connected to each other. You will have 14 double flags in all.


3.) See that massive red block awkward block in the middle of the connected flags? That's where you want to fold it in half. Apply glue to back of paper, then wrap it around your toothpick. I made sure the ends opposite of the toothpick lines up, then smooshed the rest together to make it even.


The above pic is the result! Super cute!

Hope it helps! They were super easy and fun to make, decorate with, and enjoy for day!

Tuesday, February 14, 2012

Skyrim Themed "Arrow In The Heart" Valentine Scroll

Skyrim Arrow to the Heart Valentine DIY color printed on fabric with Muslin and ink jet printer
 Yes the whole “arrow to the knee” phrase/joke is overused, but Oxboxer over at Tumblr made several super-cute Skyrim themed Valentine cards and I fell in love with them! This one in particular is perfect for my husband. We've used the phrase so much that it's completely replaced the name of the game that you just lost by the way). We rarely mention or hear the word "Skyrim.

And yeah, I nerded the Valentine up to another level. I didn't want to simply print it on some dumb piece of boring paper and have it laying about the house or tossed in with the bills. I wanted it to be extra dorky special! Plus I was dying to try this new technique I discovered on the wonderful world of Pinterest from The Country Chic Cottage blog: transferring images on fabric using an ink jet printer. So I grabbed some spray adhesive, muslin, and card stock and started playing.
  using an ink jet printer to put images on fabric 
I ironed the muslin so that there were no wrinkles (unless you are going for the rough, imperfect look, then it turns out nicely). Then I lightly spray glued to the card stock and placed the muslin on top. After I smoothed out the fabric to get rid of wrinkles and bubbles, the excess fabric was trimmed off the edges of the card stock. Then the card+muslin was placed in my ink jet printer, ready to be tested (that's when the DIY Dork in me got really excited)! I was uncertain how colored images would turn out seeing how the tutorial I learned from only used gray scale, but the results ended up being really cool! I am in love with this technique! Can't wait to use it on Halloween!

The original dark pink color in the upper text of the original artwork didn't show up well on the the muslin. The words blended in with the background and made it difficult to read. I had to brighten the font color and reprint. Good thing muslin is cheap!
Printing a Valentine on fabric using an ink jet printer, Removing the muslin from the Card stock
After I let the ink dry for a bit, I sprayed a few light layers of Mod Podge Matte Clear Acrylic Sealer and let that dry, too. Then I gently peeled the muslin off the card stock and it came off so easily! NEAT-O!
Sewing the muslin with the printed image to burlap back peice
The muslin was sewn to the burlap using a regular straight stitch and then a tight zig-zag stitch around the edge of the burlap to keep the darn stuff from shedding. Hopefully this will hold!
Skyrim Arrow to the Heart DIY Valentine    use fray check to seal the edges of the hole-punched fabric
I had some hot pink twine and fabric hearts just lying around so I decided to finally put them to use. I punched a hole in the heart and dabbed the edges with Dritz Fray Check. Then rolled up the burlap, wrapped it with the twine, slipped on the heart, and tied a bow.

And now I have a sweet Valentine made with love!
DIY Valentine Scroll Sealed with a heart

Valentine's Day "Heart Attack" For The Family!

Easy DIY Valentine's Idea
A sample of a few I made for my kiddo :) Photo by Lainy @ Geek & things
Such a neat idea inspired by Bakersfieldmom.com! They were so much fun to make and very inexpensive. With the kiddo having peanut and tree nut allergies, most valentine's candies are off limits. Not to mention we still have leftover candy from Halloween and Christmas so he is in no need of more sugary junk. It's always hard to decide what to do for him so that's why I have to search for ideas. That's when I saw this on Pinterest (go figure!). I made about 20 hearts for the kiddo and they were so much fun that I went on to make 20 more for the husband, too! And it was hard to stop at 20, I could have kept going. 
The project didn't cost me any extra money because I already had the supplies and it left a smile on my face when I was finished. 

The plan: I will scatter these all over the kiddo's door and all along my husband's side of the bedroom wall this morning. And when they wake up...SURPRISE! A "heart attack" full of wonderful things about them

Tuesday, September 21, 2010

Sonic the Hedgehog Birthday Cake using Frozen Buttercream Transfer (Beginner Level).

My son can be so unconventional, he always wants something that is not the latest craze. Totally cool if you ask me; I'm proud! But sometimes Mommy would like something easy, ya know? Go to Wal-Mart, order the latest Iron Man cake and swing by the party department for matching plates and DONE! But that is not the case so I had to put on my creativity hat. For his birthday this year, he wanted a Sonic the Hedgehog cake. So I discovered Frozen Buttercream Transfers and taught myself how to work with icing.

It was so much fun to make! It was very time consuming and I am glad I practiced on a smaller cake first. I went for something easy since I am still a cake noob. I just traced Sonic's face, not the whole body. I wrote Happy Birthday on the side and presented it for the one and only person it mattered to: my son. He loved it and was as giddy as... well as a 5 year-old on his birthday!

I wanted to use a lighter colored icing for the background, but the kiddo wanted chocolate everything. The FBCT, however, was made with store-bought vanilla Betty Crocker icing so the food coloring would be at it's best. The cake was a simple Cherrybrook Kitchen Chocolate Cake Mix - allergy free, of course! Peanut Free, Dairy Free, Egg Free, & Nut Free to be exact. Quick review of it: Everyone thought it tasted great! Found it at the local health food store, but I heard Albertson's carried it as well. I used two boxes to make a double layered cake, which it wasn't easy to do with this cake mix considering there isn't much to hold it together. But icing is a nice glue and cover up, so I practiced with it and it turned out nice!

At the party I got a lot of compliments from the parents, even an, "She didn't make that. She bought it." LOL,  yes, I did take that as a compliment! Everyone enjoyed it and I was very proud of learning something new (and thankful it turned out well). But mostly, I was happy the kids were really tickled with  it.

UPDATE (2-11-12)
I have added the pictures I snapped of my the order of my process:
The image with wax paper on top.

Black icing outline of Sonic's Head (I wish now I did the whole thing!)

Filled in the cream colored areas.

Filled in the green eyes.

Filled in the white areas of the eyes.
Sorry, I skipped some steps in the photos. But Then I filled in the rest of the areas with blue icing and then covered  the entire back with brown icing. Then gently smoothed out the back to make sure the icing settled in the empty areas. Then placed the FBCT in the freezer overnight. 


For more detailed instructions, please visit Cake Central's "How to Create a Frozen Buttercream Transfer", or check out my FBCT Resources page for links to tutorials and videos.


Wednesday, August 11, 2010

Sending Food Allergic Children to School

"Sending Food Allergic Children to School" is a great guide offered by Kids With Food Allergies to help prepare your food allergic child for school. Over the past two months I have been preparing my son to start Kindergarten and let me tell you, it's been an exciting and, at the same time, a nerve-racking experience. I am happy and scared at the same time. That's suppose to be normal right? HAHA! Well, along with backpacks, lunch boxes, school supplies, and teaching my kiddo all about "Stranger Danger," I also had to meet with his allergist to form a Food Allergy Action Plan, make sure Epipens/Twinjects are renewed, learn how to not share or trade snacks/lunch/drinks even when it looks like a safe food, and set up meetings with the school nurse and his teacher. The list goes on, like school parties. Ever since he was diagnosed at the age of one, I have been afraid that my child would have to sit out for the Christmas party or be the only child without a treat when someone brings cupcakes for their child's birthday. I refuse to put my child in a bubble and dealing with food allergies is all about education and having a backup plan. So I best be ready and stock up on some Cherrybrook Kitchen peanut-free/nut-free/egg-free/dairy-free cake mix! Which, by the way, are very delicious despite the "lack of" ingredients!

Tuesday, September 8, 2009

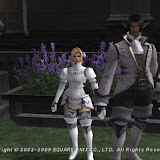
K-Ray and Desti tie the knot! Final Fantasy XI Wedding on Kujata.

~August 15th, 2009
Kujata Server

Like the big nerds we are, the boyfriend and I married our online alter egos in our favorite MMORPG. It was a blast and our guests had fun too! But some of our good friends couldn't make it. {/cry} So here are some of my favorite screenies for those who missed it!


For more screenies, visit the Picasa Album:
Desti & K-Ray's Wedding